Installation Preparation
Before installing Adempiere, the necessary preparations are as follows:
1. Prepare the PC Specifications: Processor minimum Pentium 4 with at least 512 MB of memory for training and a minimum of 1GB for the production, which of course if you have a computer with higher specifications, the better the outcome will be, and is recommended for production use a RAID system hard drive.
2. Prepare Java JDK1.6 installation file that you can download for free at: http://java.sun.com/javase/downloads/index_jdk6.jsp
In our example we will use the JDK 1.6.0_10
3. Prepare the latest version of the PostgreSQL installation file that can be downloaded for free in http://www.postgresql.org/, in the example we will use PostgreSQL version 8.4.2.1
4. Prepare the installation files 3.6.0 LTS Adempiere ERP software that can be downloaded for free at:
http://sourceforge.net/projects/adempiere
Begin the installation process Install JDK 1.6
1. Prepare the Java JDK 1.6 installation file that you have downloaded (or if not, you can download at: http://java.sun.com/javase/downloads/index_jdk6.jsp)
Note: in our example uses file-i586.exe JDK6u10-windows, you can use this version or a more baru.2. Run / Double-click the file JDK6u10-windows-i586.exe (the file name may differ depending on the date of the latest update) downloaded above. Then the file will be extracted for the preparation of the installation, as shown in the following figure:

Picture 1
3. Press Next to continue the installation process

Picture 2
4. Select “ Accept “ for License Agreement and continue.

Picture 3
5. Next, you are prompted to select packages to be installed (or press Next to install typically). By default the application will be installed
development tools, demo files, source code, and the Public JRE. You must choose Development Tools to install, while Demos, Source Code, and the Public JRE you do not have to choose, apabla you do not want to install simply select the drop-down and select Do not install this feature now.
You also have to choose the location of the installation, the default installation location where the windows are in C: \ Program files \ the location of the installation in our example is in C: \ Program files \ java \ JDK1.6.0_10 \ (if desired you can change to another location according to your needs)

Picture 4
6. Installation in progress , wait a moment

Picture 5
7. Next, you are prompted to select the folder where you want to install the JRE. The default installation location is C: \ Program files \ Java \ jre6 \.
Note: Please note the location because it will be used in subsequent installations.
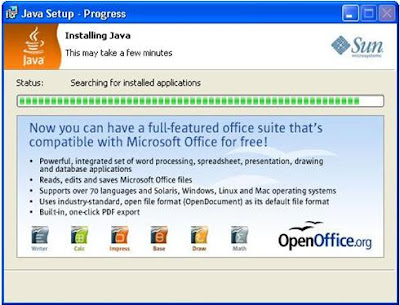
Picture 6
8. Installation in progress, wait a moment.
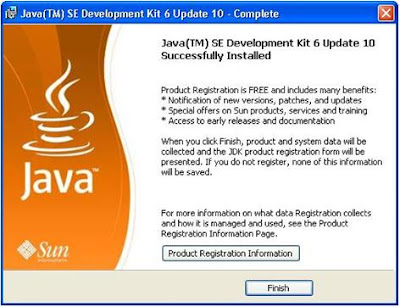
Picture 7
9. Click "Finish" and the installation process is finished.
Setting Environment
After installing Java selsai JDK6, then we have to set the first environment of the computer that will be used. For that please go to System Properties via the menu Settings & gt; Control Panel & gt; System & gt; Advanced system settings (Figure 2.8).
1. Go to Control Panel & gt; System & gt; Advanced & gt; Environment Variable, select System Variable and press "New" and then add the Path value above (Figure.9).
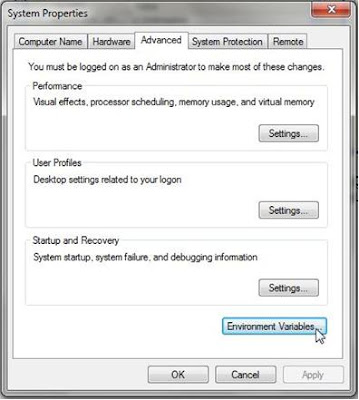
Picture 8
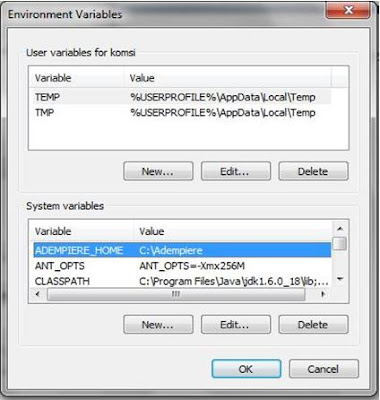
Pircture 9
2. Then, in the same way, select New and add a variable as follows:
a. For Adempiere Server, enter the following variables:
Variable Name = JAVA_HOME,
Variable Value = C: \ Program Files \ Java \ Jdk1.6.0_10
Select new again and enter the following variables:
Variable Name = ADEMPIERE_HOME
Variable Value = C: \ Adempiere
b. For Adempiere Client, enter the following variables:
Variable Name = JAVA_HOME,
Variable Value = C: \ Program Files \ Java \ Jre1.6.0_10
Select new again and enter the following variables:
Variable Name = ADEMPIERE_HOME
Variable Value = C: \ Adempiere
3. Then select the path and press "Edit", and add the following path:
a. For Adempiere Server, add the following path:
% JAVA_HOME% \ bin;% JAVA_HOME% \ jre \ bin \ client; C: \ Program Files \ PostgreSQL \ 8.4 \ bin
b. As for Adempire Client, add the following path:
% JAVA_HOME% \ bin;% JAVA_HOME% \ jre \ bin \ client

Picture 10
Note: The contents of the above parameters should be adjusted to the parameters of the installation on your computer. To check and verify you can run from a command prompt (Start & gt; Run & gt; Cmd) command:
C: & gt; SET
And to check the path you can run the command:
C: & gt; Path
Installation Database Adempiere PostgreSQLUntuk can run, you need a database. Where in the example below we will install the PostgreSQL database with the following steps:
1. Prepare the PostgreSQL installation file that you have downloaded (or if not, you can download it at: http://www.postgresql.org), which in this example we will use version 8.4.2 with the file name postgresql-8.4. 2-1-windows
Note: In our example we will use the version 8.4.21. You can use the same version or newer updates when available.
Furthermore Please double-click the file postgresql-8.4.2-1-windows
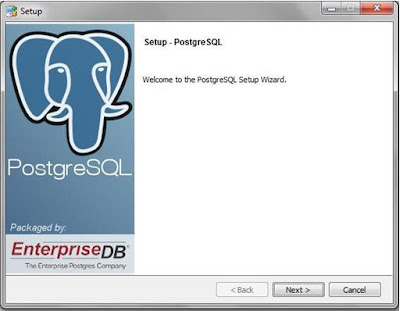
Picture .11
2. Select “Next” to start Installation

Picture 12
3. Select directory or press “Next” for default selection

Picture 13
4. Type your password 2 times and press next.

Picture 14
5. Type the Port you want to use or press next to use defalt value.

Gambar 15
6. Pilih locale untuk digunakan cluster database baru.

Picture 16
7. Press “Next” to start postgreSQL installation.

Gambar 17
8. Selanjutnya instalasi berlangsung

Picture 18
9. After installation process finished, this dialog will appear:

Picture 19
10. Installation process Completed, press Next to finished it.
1.1.2.4 Create new User and Database
1. After you install PostgreSQL, you must create a user and database in postgresql. To that run pgAdminIII by double-clicking pqAdminIII of menú windows.
2. Connect to postgresql, by pressing the right-click and select connect.

Picture 20
3. Type your password.

Gambar 21
4. Right-click on Login Role, and create a new Login Role, with the name "Adempiere" and password "Adempiere".

Picture 225. Masuk ke tab Role previledge kemudian pilih tingkatan hak akses: “superuser”, “Can create database object”, “Can create roles”, “Can modify catalog directly”,

Picture 23
6. Next, right-click on the database and create a new database with the name "Adempiere" by owner "Adempiere" and "UTF8 encoding":

Picture 24
7. In addition, you can also specify the IP address that will accept connections. Suppose you want the connection to be received through the IP 192.168.1.1 then open them postgresql.conf file and find the setting to "Connection Settings", then enter your IP address is as follows ::
Connection Settings
listen_addresses = '192.168.1.1' # what IP address (es) to listen on * = all

Picturer 25
If you want to receive all IP available on your server, replace the IP address with a "*".
8. Add the IP you are in the file pg_hba.conf. For example, suppose your computer's IP is 192.168.1.1 then add the following lines:
host all all 127.0.0.1/32 trust
host all all 192.168.1.1/24 trust # This is the IP of your computer.

Picture 26
This will make the computer a computer on a network that is one segment of the computer you will be received by the computer / server.
9. Stop and restart PostgreSQL
2.1.2.4. Install Adempiere Server
1. Unzip / Extract Adempiere_360LTS.zip into the folder C: \ Adempiere

Picture 27
2. Open Command prompt,

Picture 27a
3. Run the command:
C:\Adempiere\Run_setup.bat

Gambar 28
4. This window will shown:

Picture 29
5. Fill the parameters according to your computer configuration. Enter = postgresql database type, database name = Adempiere and include postgresql admin password (which you entered during installation of Postgre SQL). If all parameters have been tested and were all out checkmark, press "Save"
6. From the Command Prompt, run the following command:
C: \ Adempiere \ Utils \ Run_ImportAdempiere.bat
7. Next run the command:
C: \ Adempiere \ Run_Adempiere.bat it will show Windows as follows:

Pict 30
Select the database type: postgresql then input the name of your host.
8. Press the test Test Application Server and Database. In order for this process is successful, check whether the Application Server and Database already Running.
Note: To run the Application Server on your computer, you must run the command: C: \ Adempiere \ Utils \ RUN_Server2.bat
As for running PostgreSQL (if not running automatically) by clicking on the menu: Start & gt; Programs & gt; PostgreSQL 8.4 & gt; Start Server
9. If all is OK (marked with a green check mark), press Check. If all goes well, will appear the following window:

Pict 31
10. Press OK

Pict 32
11. Press OK,

Pict 33
If you've seen look like the picture 33 above, then Congratulations !! you've managed to install Adempiere 3.60LTS
Hopefully this article can be useful for users Adempiere INDONESIA.
Agung BS
agung_bs@yahoo.com
ADempiere Indonesia ordinary user
------------------------------------
Join Adempiere iDempiere Study Group Indonesia


Tidak ada komentar:
Posting Komentar